Generating a TypeScript OpenAPI client from Umbraco's Content Delivery API
I recently migrated this site to use Umbraco's Content Delivery API as part of an Astro site, and wanted to generate a TypeScript client to use to pull content.
On other projects, I've used openapi-generator-cli to create this TS-based client from Swagger documentation, and now that Umbraco has Swagger built-in for its Content Delivery API, I knew roughly where to start!
Setup
In my local project, I first needed to make sure that the Delivery API was enabled in my Umbraco site.
In my Startup.cs file:
public void ConfigureServices(IServiceCollection services){ services.AddUmbraco(_env, _config) .AddBackOffice() .AddWebsite() .AddDeliveryApi() .AddComposers() .Build();}In my appsettings.json:
"Umbraco": { "CMS": { "DeliveryApi": { "Enabled": true } }}After this, you will be able to visit /umbraco/swagger on your project URL and see all the endpoints available to use.
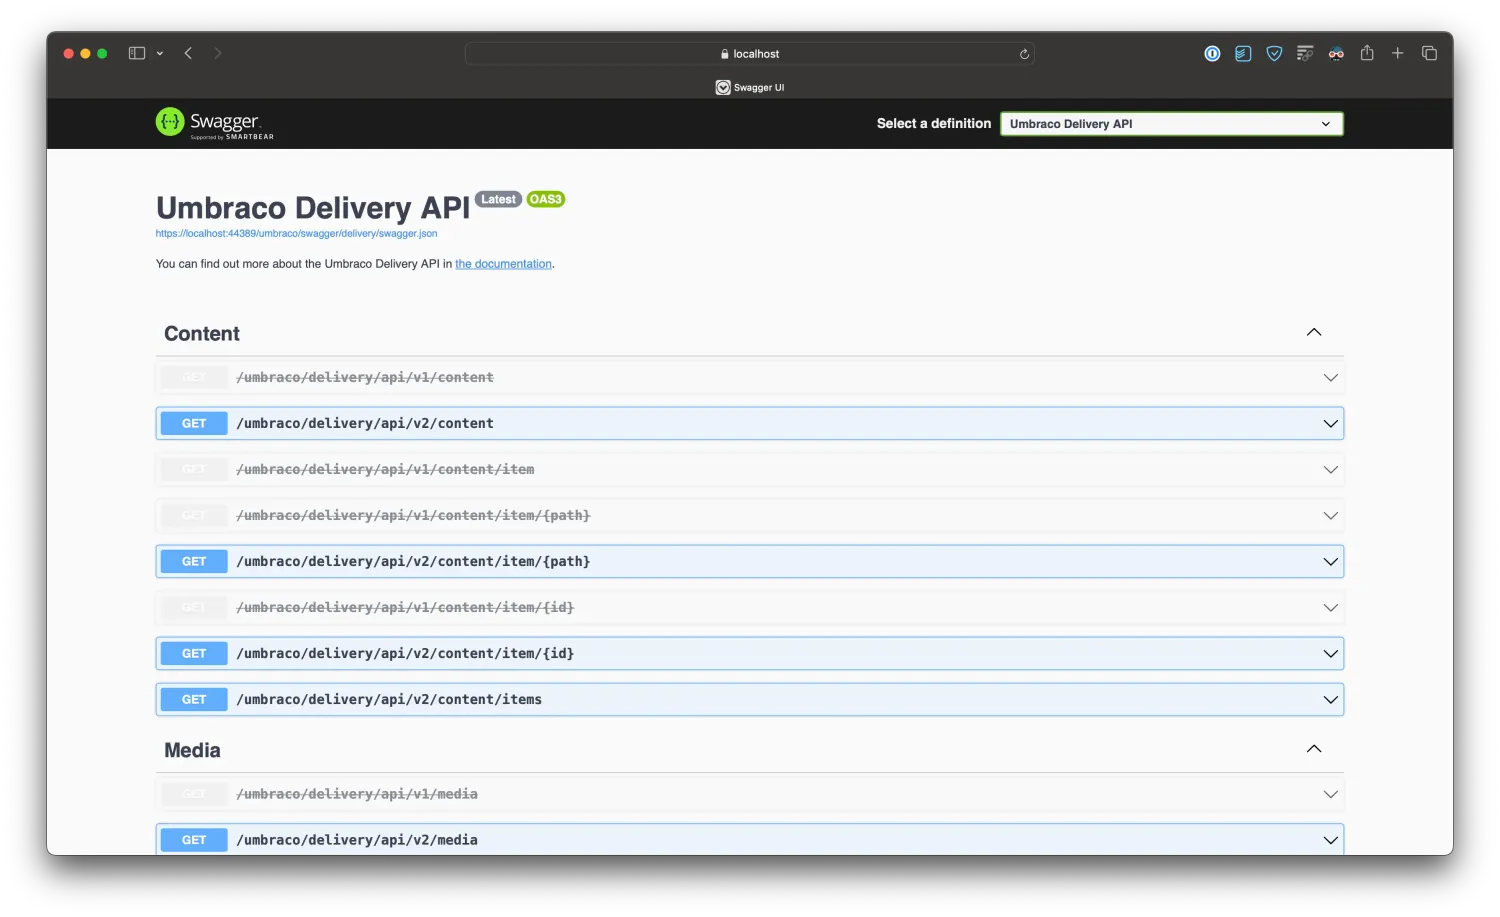
Umbraco's Swagger UI showing available endpoints for querying content and media
Now that this is up and running, we can look to get an OpenAPI client generated. However, I want to take a slight detour first...
Extending the API
A few weeks ago, I saw that fellow 2023 MVP Laura Neto tweeted posted about a package called Delivery Api Extensions she released to extend the Content Delivery API.
The idea of having strongly typed TypeScript models for each of my doctype was a really exciting premise, and something I implemented straight away—and very easily from the documentation!
Start by adding the package to your solution:
dotnet add package Umbraco.Community.DeliveryApiExtensions
Once installed, make a few changes to your appsettings.json:
"DeliveryApiExtensions": { "Preview": { "Enabled": true, "Media": { "Enabled": true }, "AllowedUserGroupAliases": [], "ContentAppWeight": -50 }, "TypedSwagger": { "Enabled": true, "Mode": "Auto" }}When we check our Swagger endpoint again now, we can see that there are models for some of my doctypes...
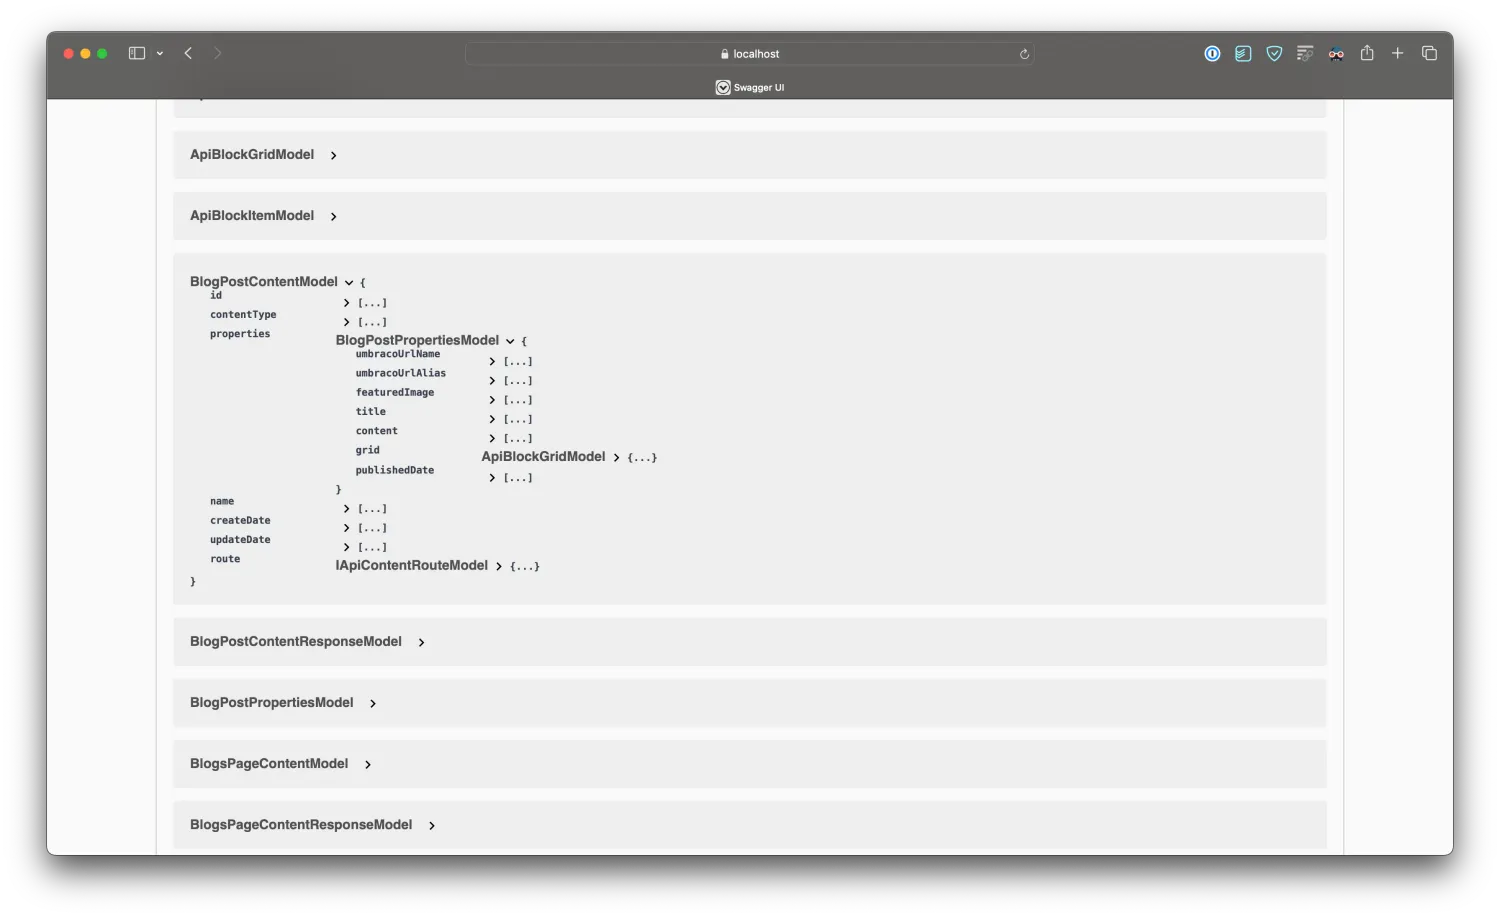
A screenshot of Umbraco's Swagger UI, showing expanded properties for BlogPostContentModel
Generation
Now that we're going to have strongly typed models in our generated TypeScript code, let's generate it!
This blog post originally suggested using openapi-generator-cli to generate your TypeScript API however after reviewing Kevin Jump's brilliant early adopter's guide for Umbraco 14's new backoffice, his suggestion was to use openapi-typescript-codegen as this is what Umbraco is using internally to connect the new backoffice to the Management APIs.
We'll need to get openapi-typescript-codegen installed and configured to use Swagger to generate TypeScript classes for us.
Start by installing with your package manager of choice:
npm install openapi-typescript-codegen -D
Once installed, we'll need to add a script to package.json that we can run on command line. Here's mine, let's break it down a bit:
{ "scripts": { ... "generate": "openapi --input http://localhost:20625/umbraco/swagger/delivery/swagger.json --output src/api --postfixServices Resource --useOptions" },}--input http://localhost:20625/umbraco/swagger/delivery/swagger.json tells the generator the URL we want to use as our reference. Your Umbraco solution will need to be running at this point and you may need to make a change to your Startup.cs to stop this URL from redirecting to https, otherwise you'll have lots of fun with self-signed certificates not being allowed!
if (!env.IsDevelopment()){ app.UseHttpsRedirection();}--output src/api defines the output location. In this instance, the files will be generated in the src/api inside my Astro project.
--postfixServices Resource tells the generator that I want my API services to be postfixed with the word "Resource", so the Content Delivery class becomes ContentResource in my generated TypeScript code.
--useOptions will allow us to use an object as a parameter when quering, rather than individual parameters.
Opening your terminal and running npm run generate will now go away and create a TypeScript client for you to use!
Usage
The client that has now been generated in the output folder you specified should be ready to go! Your usage will vary based on the type of project you're working in, but here is a simple example of how I get all my blog posts using my generated TypeScript client in Astro.
Pro tips
Two very quick tips to make your development experience even better when working with these examples!
Firstly, in my .env file at the root of the project I'm set up to connect to either my local Umbraco environment or my live one for testing content from production. These variables can then be picked up inside Astro using import.meta.env.VARIABLE_NAME:
PUBLIC_BASE_URL=http://localhost:20625PUBLIC_BASE_URL_HTTPS=https://localhost:44389
# PUBLIC_BASE_URL=https://my.live.env# PUBLIC_BASE_URL_HTTPS=https://my.live.env
Secondly, use TypeScript path aliases! Rather than having lots of ../ in import statements like import { file } from '../../../../../api'} you can alias these folders inside your tsconfig.json.
{ "compilerOptions": { ... "paths": { "@/*": [ "src/*" ] }, ... }}Then inside one of my Astro pages (/src/pages/index.astro for example) I can reference both my API and the environment variables we've previously set.
// Import some of our new generated API files// If you're using VS Code, Intellisense will suggest these for youimport { OpenAPI, ContentResource } from '@/api';
// Update the OpenAPI base URL to allow us to connect to the API// My environment variable here is the http version of my local URLOpenAPI.BASE = import.meta.env.PUBLIC_BASE_URL;
// Run an awaited fetch against the Delivery API looking for nodes with// the contentType of `blogPost`const blogPosts = await ContentResource.getContent20({  filter: ['contentType:blogPost']});
The getContent20() is used as the name generated from the Content Delivery API as it's versioned as v2.0, so you will find you have an obsolete getContent() function in your generated API too. Kevin Jump has a great example in his TimeDashboard demo of how you can remove the versioning from each function name.
At the moment this isn't using any of the strongly typed models enabled by the Delivery Api Extensions package, but once I've got this data from the API, I can then use it in a strongly typed way.
Adding to our /src/pages/index.astro file:
// The `type` here has been automatically added by VS Code Intellisenseimport { OpenAPI, ContentResource, type BlogPostContentModel } from '@/api';
<section class="c-posts">{  blogPosts.items.map((blogPost: BlogPostContentModel) => (    <article class="c-post">      <h2><a href={blogPost.route.path}>{blogPost.name}</a></h2>      <ul class="date text-muted text-uppercase">        <li>          <time datetime={new Date(blogPost.properties.publishedDate).toISOString()}>            {new Date(blogPost.properties.publishedDate).toLocaleDateString('en-gb', {              year: 'numeric',              month: 'short',              day: 'numeric',            })}          </time>        </li>      </ul>      <p>{blogPost.properties.content}</p>    </article>  ))}</section>
And there we have it! Strongly typed TypeScript models based on what Umbraco is feeding us from the Content Delivery API!